17 May 2021

The React framework advantage

We’re big fans of React at Catch. But just what is React, and how do we use it?

React is a JavaScript library used in web development to build interactive elements on the web. The main advantage for end users is the fast interactivity they’re provided with, as there should be very little reload time when new data is presented on their screen. This, in turn, leads to a more positive user experience.

The React advantage for End Users

As you probably know, we’re Drupal experts. Whilst Drupal is an excellent CMS for general website usage, there comes a time when users want a bit more which is when we reach for React to build a ‘web app’ to sit on a page.

Think of Google Maps, for example. What a pain it would be if there was a noticeable page refresh (such as clicking on a link and waiting for the page to reload) each time you zoomed in or out or panned across the map. React helps eliminate this friction, allowing elements to quickly load on a page as the user interacts with them.

React makes it painless to create interactive UIs. Design simple views for each state in your application, and React will efficiently update and render just the right components when your data changes.

ReactJS.org

The React advantage for Developers

React is a JavaScript library that at a fundamental level is used to build many components each with their own independent ‘state’ that tells the component what to do. If you think of a button on a website as a component, the state might include the colour, the text (e.g. ‘Click Here’) and the URL (e.g. ‘https://www.catchdigital.com’). As you build out your React project with components, it allows you to avoid the time-intensive process of coding and testing over and over meaning you can build new features and scale your application.

Developers can reuse the button all over the web app and update the ‘state’ of each of these using ‘props’. The advantage to this is that every button on the site will look and behave in the same way. Of course, components will be much more complicated than just a button, and can do more than just take a user from one page to another.

Below are some helpful definitions to understand the terminology used when discussing React.

  • State - The current data that is within the component, any time this is updated and the state changes, a re-render will take place
  • Props - This is how information or data is passed from one component into another. For example if we reuse the button analogy where have colour, text and url managed in the state of the button, we could also have disabled as a state. If the button component is associated with a contact form, we could set the disabled state of the button to be true until all of the fields of the form are completed and then update the state of the button component using props

Developers are able to reuse tested code and know that it will stand up to stress.

The React advantage for our clients

We now know that React is a data driven tool, and allowing our clients to manage the content for a data driven API means we can treat Drupal as a headless CMS for the output of JSON in an API format. New content can be created in the same way new pages can be created. The same goes for content within each page, reducing what could be a time intensive process to update their site (or multiple sites from one data source).

Some examples of our use of React

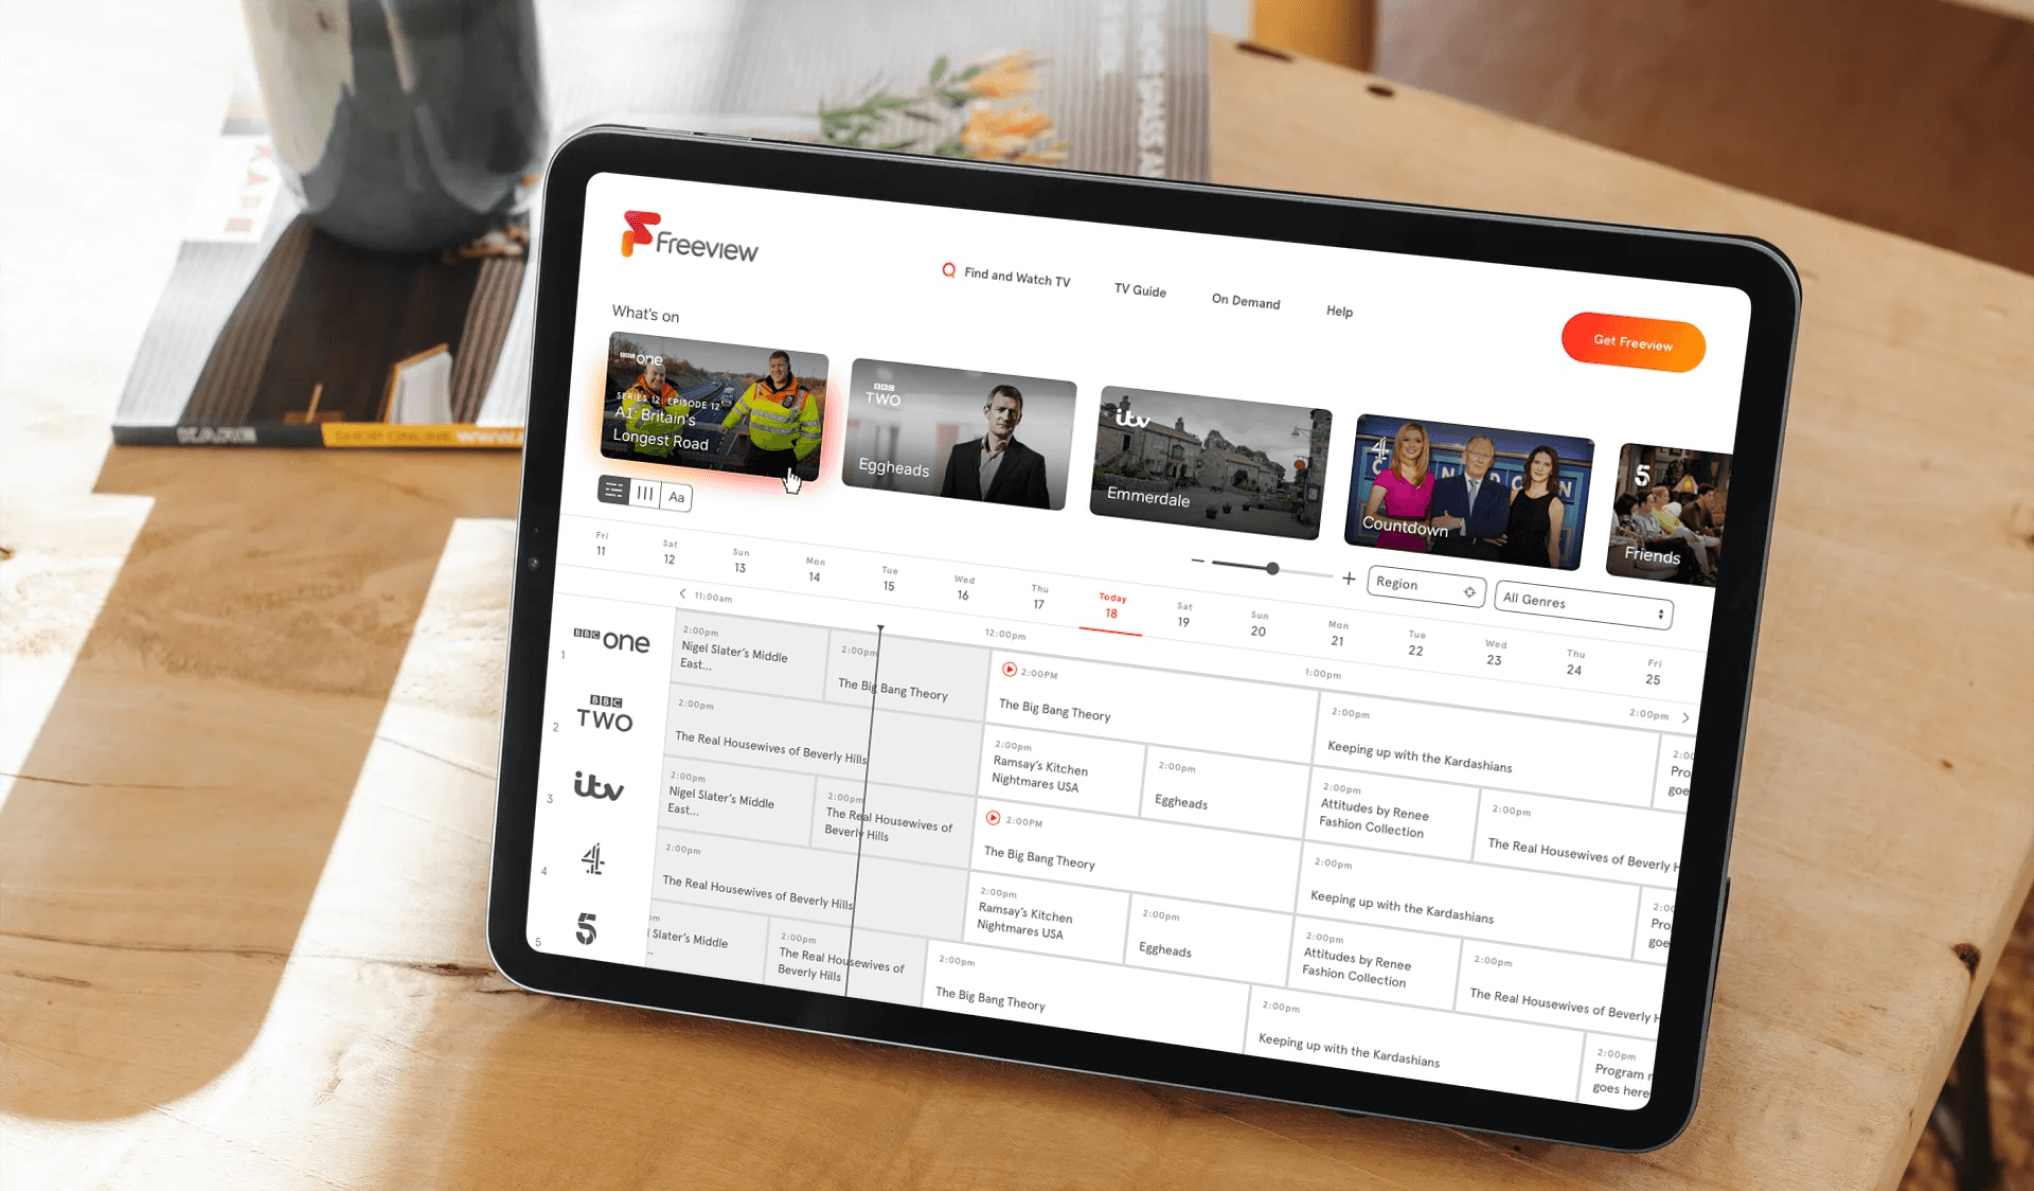
From quickly adapting to what the user is looking for on the TV Guide on our Freeview web platform:

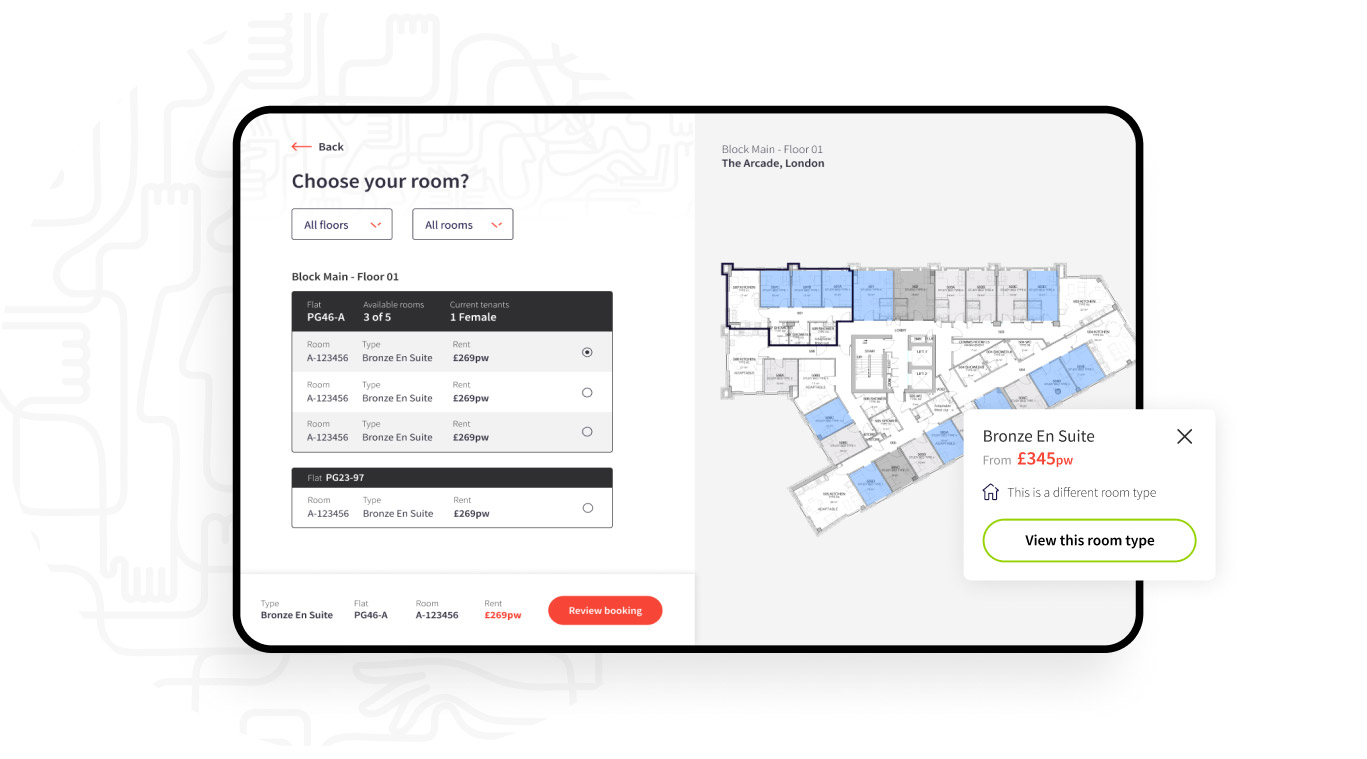
To helping students filter and book available accommodation in London via IQ Student Accommodation:

To helping global telecommunication company SES provide users with the ability to search for satellite footprint information using their “Our Coverage” tool within their existing Drupal solution:

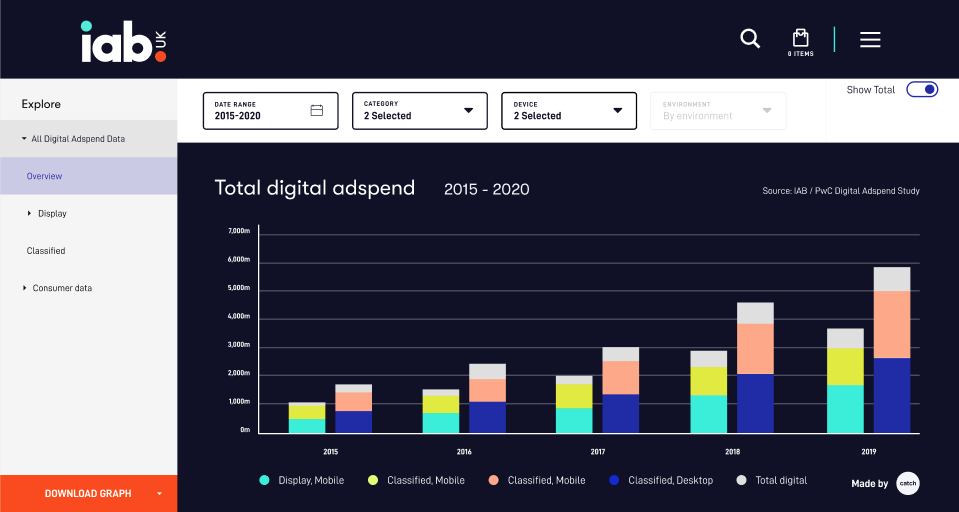
Or providing the Internet Advertising Bureau (IAB) Members with a quick and easy way to view Adspend data in a graph that instantly updates as you change dates and add filters:

Catch is experienced in offering our clients effective solutions that take advantages of all the benefits of React.

If you're ready to start your journey and see how we can help you improve your connection with your audience through smart technology like React, don't hesitate to get in touch.

30 Oct 2015

Tweet our pumpkin #CatchHalloween

It’s Halloween [*insert all manner of ghoulish GIFs and eerie sound effects*]. And, courtesy of Founding Partner/MD Jonathan, we’ve been challenged to a classic pumpkin carving competition! But as is the nature of a digital agency, some spectacular creations have materialised… (some a little less so). But one pumpkin in particular, by UX Designer Euan Mackie, has been stealing a significant proportion of the limelight...

We’ll let Euan give you the gory details:

Intro

After receiving our to-be-carved pumpkins, I had a little google for inspiration. While browsing lots of artistic designs, I knew I wanted to do something slightly different, so I challenged myself to see how I could add some tech.

Background

A few weeks ago I brought a Photon - a development board from a company called Particle. It’s a little computer designed for making and creating objects connected to the internet.

The term Internet of Things (IoT) represents a world of interconnected devices and smarter living, where, for example, light bulbs can react to you putting your key in the door. The IoT movement has been growing in popularity, with products such as Amazon dash, Google’s Nest thermostat and Philips hue light bulbs entering the mainstream.

The usual approach for prototyping these projects involves a product called Arduino. We love it because of its open source background and the variety of components you can plug into it (more about that here). But I wanted to use the Photon as it simplifies this whole process. It’s just one match box sized board and that is all you need to get started.

The Challenge

I wanted this to be a rapid project, I knew the pumpkin carving would take time and I only had a few spare hours. So, I set myself a time limit: A working IoT pumpkin within 2 hours - something fun AND worthwhile. Because why do a prototype if it doesn't bring delight to those using it!

Getting Started

The photon board comes in a nicely designed little box with enough extra components to make your first project. The board came into it’s own with the setup. Usually with Arduino there’s a lot to set up and learn, It can be a tough onboarding experience for those brand new to hobby electronics. (There are lots of helpful tutorials, though!)

The Photon board is totally different; just power it up though USB, open the app on your phone and you’re already away. A quick entry of your WiFi settings and it’s set up ready for your first project. Using the supplied LED, you can use your phone to make the circuit and light up the LED. I had success within 5mins of opening the packaging. The App shows how and why this happens, really great for those starting to learn the fundamentals behind development.

Ideas

After few more tutorials under my belt, I started thinking about using twitter and Instagram hashtags to turn the pumpkin lights on. A fairly simple approach, however, I knew it would easily showcase the power of IoT without being over complicated.

The Plan

I’m a big fan of If this then that ( IFTTT ). It’s an online service using logic if THIS happens then make THAT happen. I knew IFTTT would be a simple and quick way of searching Twitter and Instagram for a particular hashtag, the ‘THIS’. I started looking into what ‘THAT’ I could use for my Photon board. I saw some options, however, they were mostly slightly more technical than I had the time and skills for. I’d have loved to use a node.js app or MQTT, however that was a little out of my reach. So I just used the pre built ‘THAT’.

Getting IFTTT to talk to the Photon this way is very simple, it’s mostly handled by magic*. All I needed to do was make sure everything was named correctly and I’d copied and pasted the correct bits of code. I told the Photon to power up a chosen section of the board when a tweet arrives.

The photon comes with a breadboard, this is basically a quick and easy way to connect electronics together without the need to solder anything together. I added few LED’s to the selected section with resistors, taken from their tutorial, and I was ready to test it all out.

*Yes I know it’s not actual magic.. It’s a mix of hosted code repo’s and online developer environments…

How it all turned out

After a bit of trial and error, I managed to get it working. Result! Every tweet or Instagram with #CatchHalloween made the LED’s light up. In less than two hours, I’d gone from a novice with the board, to a real working prototype. Not too bad.

One of the downsides to IFTTT is how long it takes to search and return tweets. Sometimes up to every 15mins. This isn’t ideal when people are sending tweets and expecting an instant light up. From my earlier discovery, I know it’s possible in few different ways, the most logical being node.js. The light strength isn’t ideal in a very bright studio, but It’s noticeable (we know if you’ve tweeted!).

If you’ve got any questions, thoughts or advice on a project like this then get in touch!

Start a conversation

0207 494 3554
or
newbiz@catchdigital.com